Making the jump to all-grain brewing represents a major milestone for any home brewer. While extract brewing offers convenience, all-grain brewing gives you complete control over your beer’s character, flavor, and strength. However, this advanced technique requires specialized brewing equipment, and none is more critical than a quality grain mill.
- Why Your Home Brewing Setup Needs a Grain Mill
- Freshness Matters for Better Beer
- Control Over Crush Consistency
- Cost Savings Over Time
- Types of Grain Mills for Home Brewing
- Key Features to Consider When Choosing a Grain Mill
- Gap Adjustment Capability
- Hopper Capacity
- Drive Options
- Construction Quality
- Setting Up Your Grain Mill for Success
- Maximizing Your Grain Mill Performance
- Regular Maintenance
- Common Mistakes to Avoid
- Integrating Your Mill Into Your Brewing Process
- Building Your Complete All-Grain Setup
- Taking Your Home Brewing to the Next Level
A grain mill crushes malted barley to the perfect consistency for mashing, transforming whole grains into the foundation of exceptional homebrew. Whether you’re a beginner ready to advance your skills or an experienced brewer looking to refine your setup, understanding grain mills will elevate your brewing game significantly.
Why Your Home Brewing Setup Needs a Grain Mill
All-grain brewing starts with proper grain preparation, and pre-crushed malt from your homebrew shop won’t deliver the same results as freshly milled grain. Here’s why investing in your own grain mill makes such a difference.
Freshness Matters for Better Beer
Crushed grain loses its potency quickly. The starches and enzymes essential for conversion begin degrading immediately after milling. When you mill your own grain just before brewing, you preserve these crucial components, leading to better extraction efficiency and more robust flavors in your finished beer.
Control Over Crush Consistency
Different beer styles require different crush sizes. A fine crush maximizes extract efficiency but can lead to stuck sparges, while a coarser crush flows better but may reduce your overall efficiency. With your own grain mill, you can adjust the gap settings to match your brewing system and recipe requirements.
Cost Savings Over Time
While the initial investment in brewing equipment like a grain mill might seem substantial, it pays off quickly. Whole grain costs significantly less than pre-crushed malt, and you’ll save on the markup that homebrew shops charge for the milling service.
Types of Grain Mills for Home Brewing
Understanding the different types of grain mills available helps you choose the right beer brewing gear for your setup and budget.
Roller Mills
Roller mills use two or more adjustable rollers to crush grain between them. These mills produce the most consistent crush and cause minimal damage to grain husks, which helps prevent stuck sparges during lautering.
Pros:
- Excellent crush consistency
- Preserves husk integrity
- Adjustable gap settings
- Can handle large volumes efficiently
Cons:
- Higher cost than other options
- Requires more counter space
- May need motorization for large batches
Corona-Style Mills
These affordable mills, originally designed for corn, feature two metal plates that crush grain between them. While budget-friendly, they’re less precise than roller mills.
Pros:
- Very affordable entry point
- Compact design
- Hand-crank operation
Cons:
- Less consistent crush
- Can shred husks
- Slower processing
- Limited adjustability
Hammer Mills
These mills use rotating hammers to pulverize grain. While effective, they’re typically overkill for most home brewing applications and can damage husks excessively.
Key Features to Consider When Choosing a Grain Mill
Gap Adjustment Capability
Look for mills with easy gap adjustment mechanisms. The ability to fine-tune your crush based on your brewing system and grain bill is essential for optimal results. Most quality mills offer gap settings from 0.025 to 0.045 inches.
Hopper Capacity
Consider how much grain you typically mill at once. Smaller hoppers work fine for five-gallon batches, but if you brew larger volumes or multiple batches, a bigger hopper saves time and effort.
Drive Options
Many mills come with hand cranks, but motorization options make processing large amounts of grain much easier. Some mills include motor mounts, while others can be retrofitted later.
Construction Quality
Stainless steel rollers and hardened steel construction ensure your mill will last for years of regular use. Avoid mills with soft metals that may wear quickly or affect the taste of your grain.
Setting Up Your Grain Mill for Success
Finding the Right Crush Size
Start with a gap setting around 0.030-0.035 inches for most base malts. Specialty grains may require different settings. Test your crush by examining the grains – you want the endosperm exposed while keeping husks largely intact.
Conditioning Your Grain
Some brewers lightly spray their grain with water before milling. This technique, called conditioning, helps keep husks intact during crushing, reducing the risk of stuck sparges.
Safety Considerations
Always follow safety guidelines when operating your mill. Keep fingers away from moving parts, ensure the mill is securely mounted, and wear safety glasses when milling to protect against grain dust.
Maximizing Your Grain Mill Performance
Regular Maintenance
Clean your mill thoroughly after each use to prevent grain residue buildup. Check roller alignment periodically and lubricate moving parts according to manufacturer recommendations.
Calibration and Testing
Test your crush efficiency by conducting small-scale mashes with different gap settings. Track your extraction efficiency to find the optimal settings for your system.
Storage and Organization
Store your milled grain in airtight containers if you’re not brewing immediately. Label containers with grain types and milling dates to maintain organization in your brewing area.
Common Mistakes to Avoid
Over-Crushing Your Grain
While fine crushes increase efficiency, going too fine creates a flour-like powder that will definitely cause stuck sparges. Find the balance between extraction and flow rate.
Neglecting Husk Integrity
Shredded husks contribute astringency to your beer. Adjust your mill or technique if you notice excessive husk damage in your crushed grain.
Inconsistent Gap Settings
Document your successful gap settings for different grain types and brewing systems. Consistency in your milling process leads to predictable brewing results.
Integrating Your Mill Into Your Brewing Process
Plan your milling as part of your brew day preparation. Many brewers mill their grain the night before brewing to save time on brew day. Store milled grain in sealed containers to maintain freshness and prevent contamination.
Consider your workspace when setting up your mill. Adequate lighting, ventilation, and cleanup materials make the milling process more efficient and enjoyable.
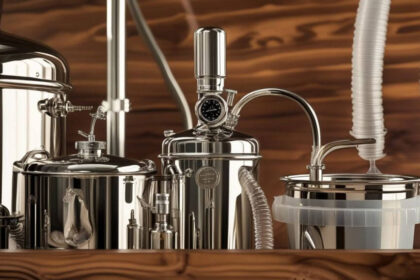
Building Your Complete All-Grain Setup
While a grain mill is essential for all-grain brewing, it’s just one piece of the puzzle. Your complete setup should include a mash tun, hot liquor tank, boil kettle, and proper temperature control equipment. Each component works together to create the perfect environment for extracting sugars from your freshly milled grain.
Taking Your Home Brewing to the Next Level
A quality grain mill transforms your home brewing from a hobby into a craft. The ability to mill your own grain opens up new possibilities for recipe development, cost savings, and beer quality improvement. Whether you choose a basic Corona-style mill or invest in a premium roller mill, the key is selecting equipment that matches your brewing goals and frequency.
Starting with all-grain brewing might seem overwhelming, but the right brewing equipment makes the process manageable and rewarding. Fresh-milled grain produces noticeably better beer, and the satisfaction of controlling every aspect of your brewing process makes the investment worthwhile.
Your grain mill will become one of the most important pieces of beer brewing gear in your arsenal, serving as the foundation for countless batches of exceptional homebrew. Take time to research your options, consider your long-term brewing goals, and choose a mill that will grow with your skills and ambitions.